Begin by taking a glance at the six figures below, 3d sketches that show 6 major building steps. Look at the last one which shows the final destination – the completed wheel. Notice that it is composed of sub-units, symmetrc sub-units of identical shape but different colors.
Each sub has one central cube of a neutral hue (greyscale), surrounded by three cubes of a single color. At each position, the peripheral cube assume one color of the rainbow. Color wheels are traditionally presented with red at the top.
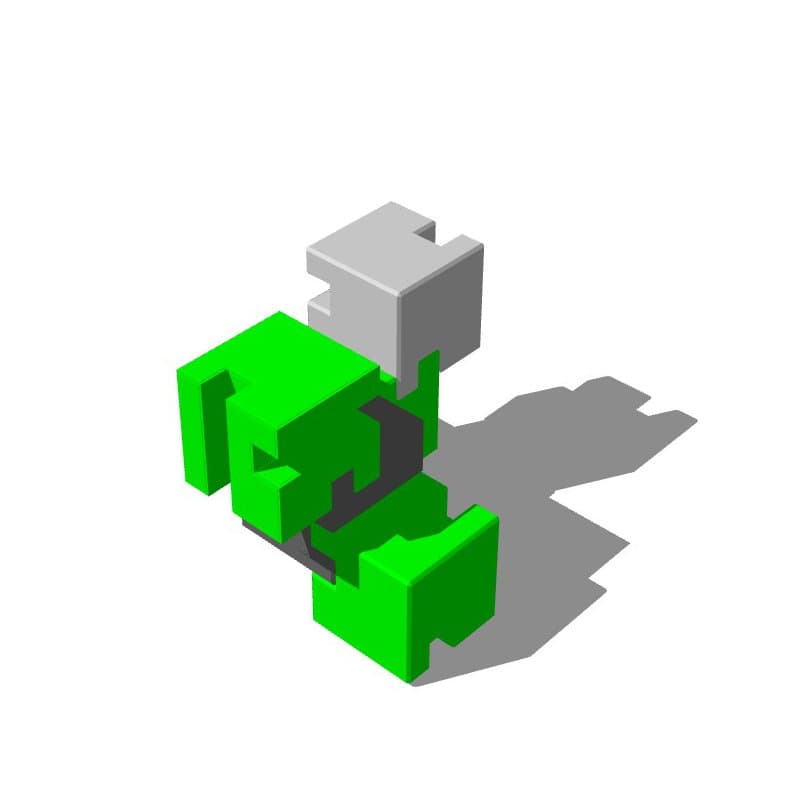
To accomplish that, we start with GREEN – the red's complement – at the lowest point. The green sub-unit rests on the table and it supports the grey corner stone.
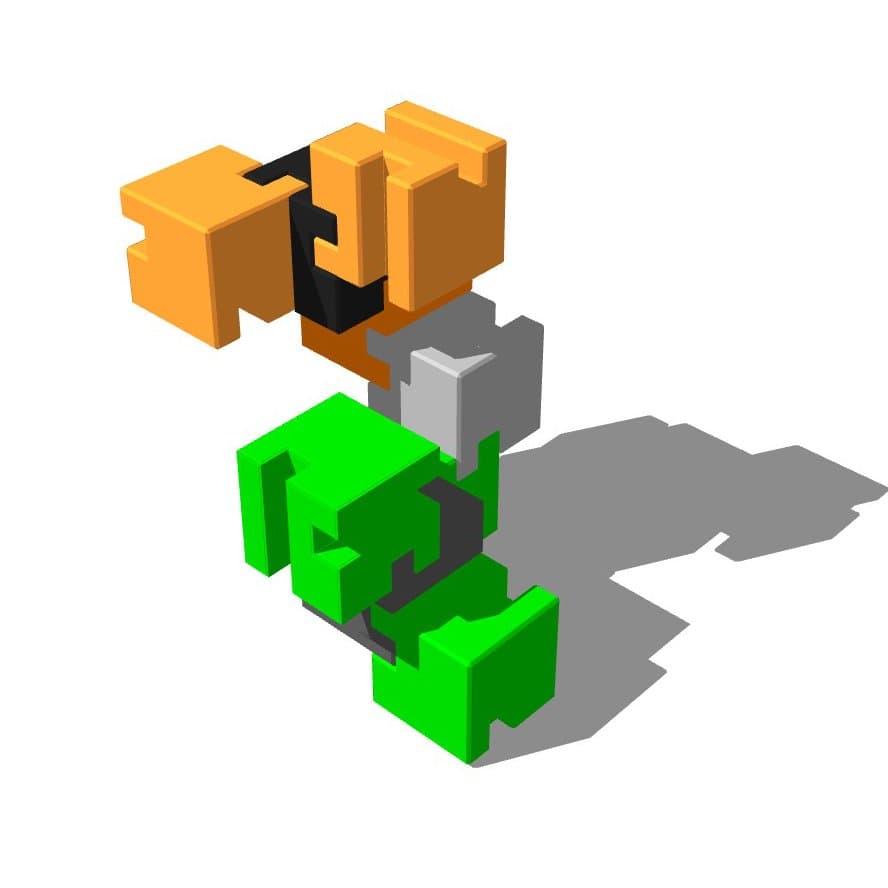
The corner stone is about to connect with two more sub-units, subs of the remaining two complementary colors. first the ORANGE, on top,
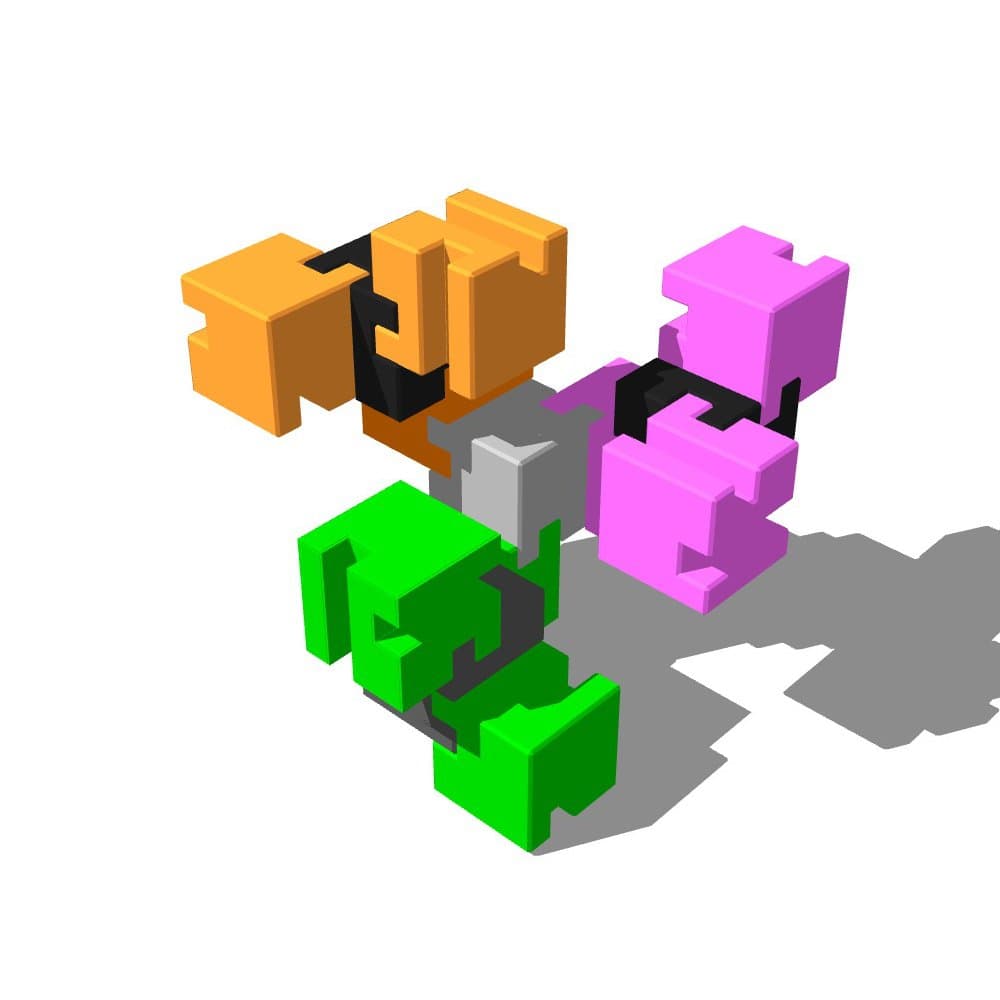
Then the VIOLET, to the left. Notice that stage three has taken on the triangular symmetry, thus also signaling the positioning of the primary colors, at the intervals left vacant,
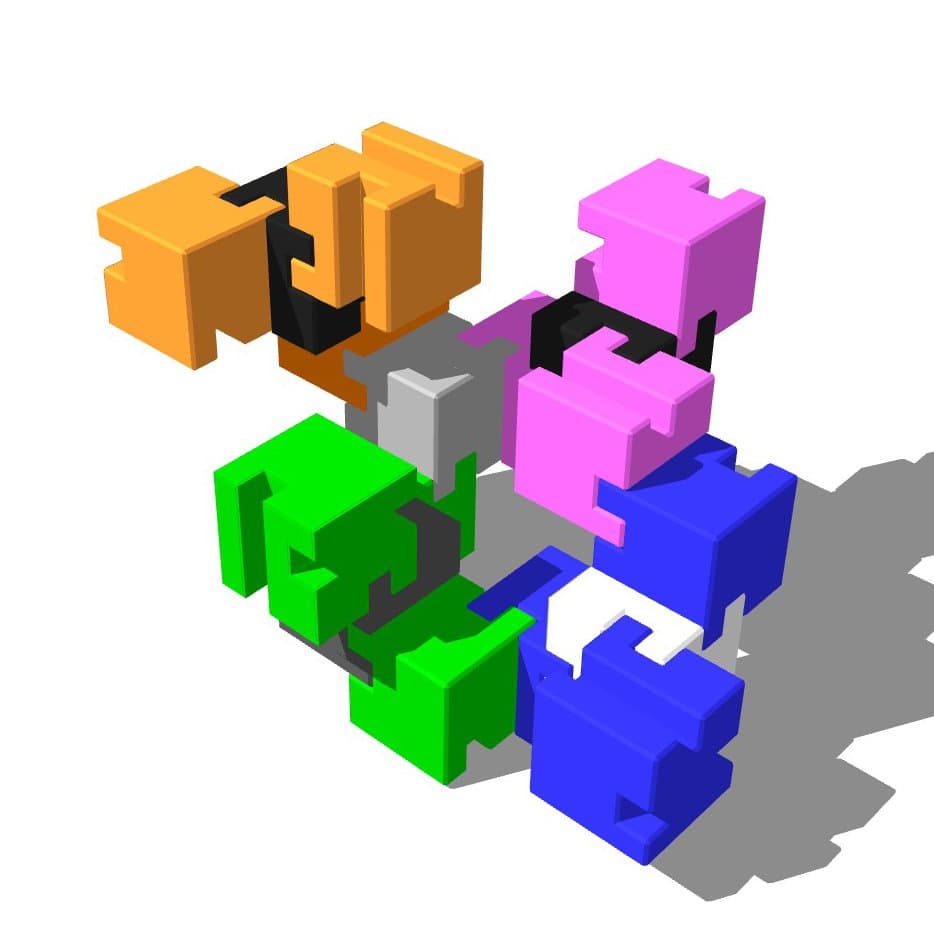
At stage four, BLUE – a primary color – has taken its place between green and violet, and it attaches to them, not to the corner stone where the channels are all taken.
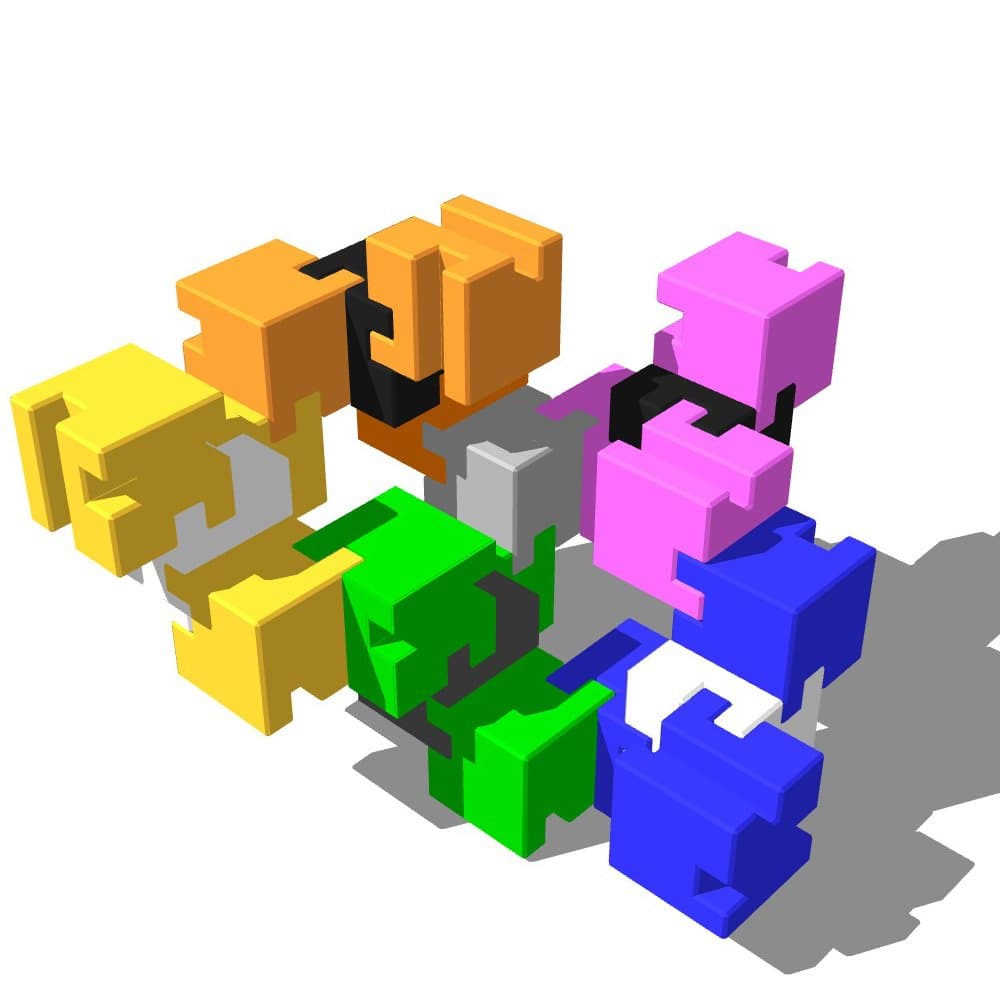
YELLOW now attaches to green below and orange on top, leaving the remaining top slot for:
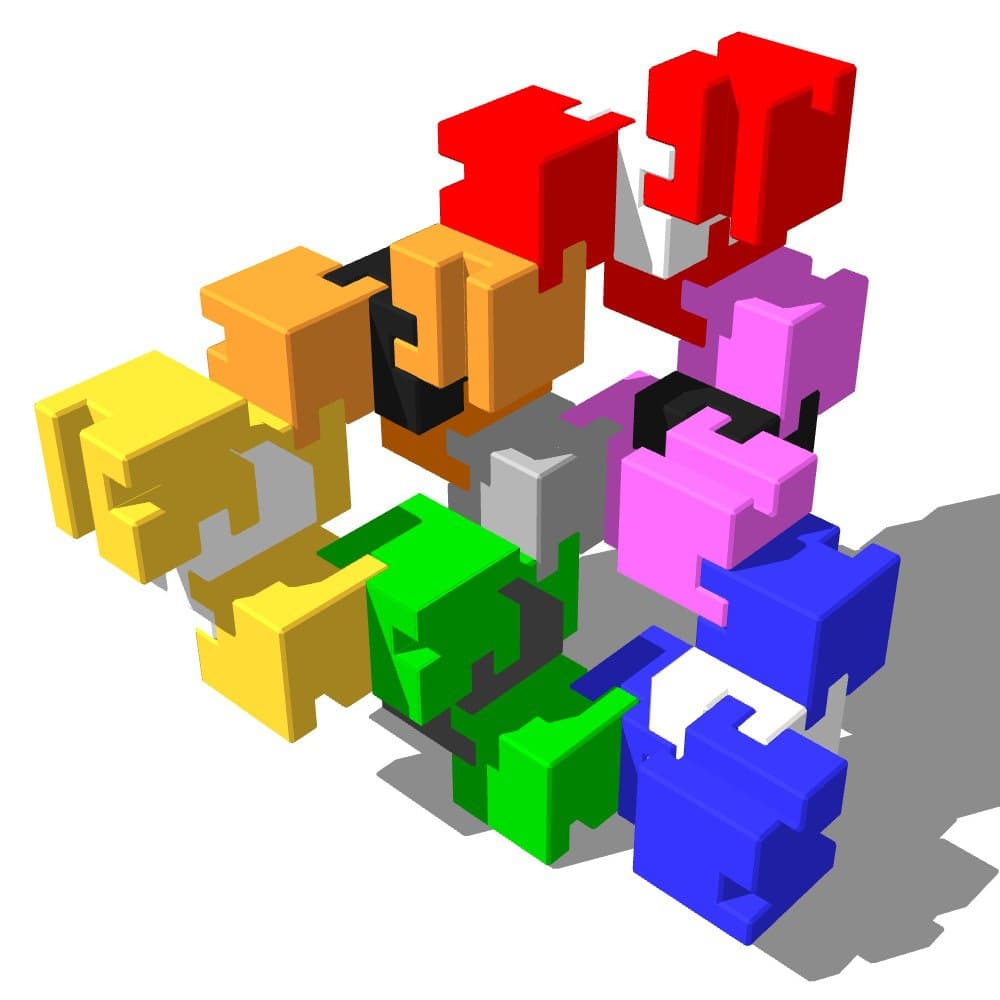
Sure enough – RED – the king of the color set.
